

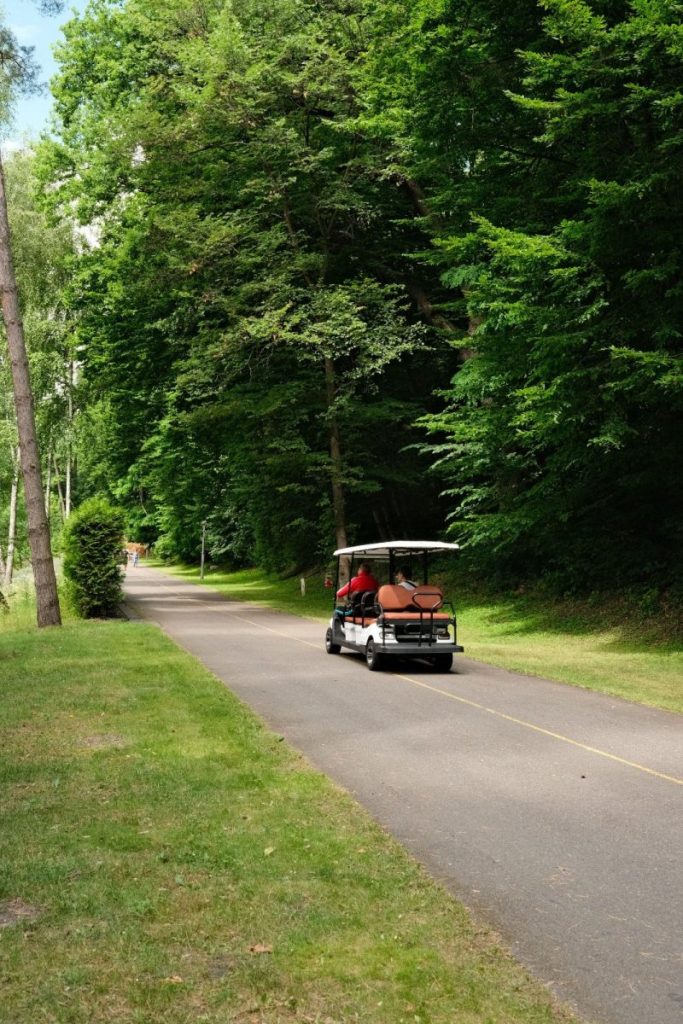
If you own a golf cart in South Florida, you already know that the combination of heat, humidity, salt air, and frequent use can take a serious toll on every component of your vehicle — and your leaf springs are no exception. As summer approaches and temperatures begin climbing into the upper 90s, getting your golf cart ready for the season isn’t just a good idea — it’s essential for safety, performance, and longevity.
Leaf springs are one of the most critical — and most overlooked — parts of any golf cart suspension system. They absorb road shock, support the weight of the cart and its passengers, and keep your ride smooth across everything from manicured fairways to rough neighborhood paths. Neglecting them can lead to a bumpy ride, uneven tire wear, and even dangerous handling problems.
This comprehensive leaf spring maintenance checklist is designed specifically for South Florida golf cart owners who want to keep their carts running smoothly all season long. Whether you’re a casual weekend golfer or someone who uses their cart daily around a retirement community or beach-side neighborhood, this guide has everything you need to know.
Why Leaf Spring Maintenance Matters More in South Florida
South Florida’s climate is unlike anywhere else in the country. The combination of extreme heat, near-constant humidity, frequent rain, and proximity to saltwater creates an environment that accelerates corrosion, rust, and wear on metal components. Leaf springs — which are typically made of steel — are especially vulnerable to these conditions.
During the winter months, many South Florida golf cart owners use their carts less frequently, which can actually cause its own set of problems. Leaf springs that sit stationary for extended periods can develop surface rust, and lubricants can dry out or become contaminated. Then, when summer arrives and usage picks up dramatically, you’re putting stressed components under even more strain.
“In South Florida, we see more leaf spring issues in the summer than any other time of year — not because summer is particularly rough, but because owners haven’t properly prepared their carts after months of reduced use,” say the technicians at South Florida Golf Carts, a trusted local service provider serving communities throughout the region.
The good news is that a thorough pre-summer inspection and maintenance routine can catch problems early, extend the life of your suspension system, and save you from costly repairs down the road. Let’s walk through exactly what you need to do.
Understanding Your Golf Cart’s Leaf Spring System
What Are Leaf Springs and How Do They Work?
Before diving into the checklist, it’s worth taking a moment to understand what you’re working with. Leaf springs are a type of suspension component made up of several layers — or “leaves” — of curved steel bound together. As your golf cart moves over bumps and uneven terrain, the leaves flex and absorb the impact, providing a cushioned ride for you and your passengers.
Most golf carts use a simple, single-axle leaf spring setup on the rear of the vehicle, though some models also incorporate them up front. The springs are mounted between the axle and the frame of the cart, held in place by U-bolts and shackles. Over time, these components wear, fatigue, and corrode — especially in South Florida’s demanding climate.
Signs That Your Leaf Springs Need Attention
Before you even start your formal inspection, keep an eye out for these common warning signs that your leaf springs may need maintenance or replacement:
Sagging or uneven ride height: If one side of your golf cart sits lower than the other, or the entire rear end seems to have dropped, your leaf springs may have lost their tension or broken entirely.
Excessive bouncing or harsh ride: Leaf springs that have lost their flexibility will either be too stiff or too soft, both of which result in a noticeably uncomfortable ride.
Squeaking or creaking noises: Metal-on-metal friction between the leaves or at the mounting points is a clear sign that lubrication is needed or that components are worn.
Pulling to one side: If your cart consistently drifts left or right, uneven spring tension could be the culprit.
Visible rust or cracking: Any visible surface rust, deep corrosion, or cracks in the spring leaves themselves are serious red flags that warrant immediate attention.
The Complete Pre-Summer Leaf Spring Maintenance Checklist
Step 1: Gather Your Tools and Safety Equipment
Before you start any inspection or maintenance work, make sure you have the right tools and that you’re working safely. You’ll need:
A floor jack and jack stands rated for your golf cart’s weight, a flashlight or work light, a wire brush, penetrating oil (such as WD-40 or PB Blaster), a torque wrench and socket set, leaf spring lubricant or silicone spray, a clean rag, and safety glasses and gloves.
Always work on a flat, stable surface. Engage the parking brake and chock the wheels before lifting the cart. Safety first — always.
Step 2: Visual Inspection of the Leaf Springs
Start with a thorough visual inspection. Get down low with your flashlight and look at each leaf spring carefully. In South Florida’s salt-air environment, surface rust can develop quickly, so don’t be alarmed by minor surface oxidation. However, deep rust, pitting, or flaking is a concern that needs to be addressed.
What to Look For During Visual Inspection
Cracks or breaks in the leaves: Look along the entire length of each leaf for any visible cracks, especially near the center bolt hole and the ends of the leaves. Even a hairline crack can quickly become a full break under load.
Separation between leaves: The leaves should sit flush against each other. If you notice gaps or separation, the spring pack may have shifted or a leaf may be broken.
Bent or deformed leaves: Compare the curvature of your springs to what they should look like. Springs that have flattened out significantly have lost their tension and need replacement.
Corrosion and rust: Surface rust can be treated, but heavy corrosion that has eaten into the metal compromises structural integrity and means it’s time for new springs.
Step 3: Inspect the Center Bolt and U-Bolts
The center bolt holds all the leaves together in the spring pack, while U-bolts secure the spring to the axle. Both are critical fasteners that take a lot of stress during normal operation.
Check the center bolt for any signs of bending, corrosion, or looseness. A broken center bolt will allow the leaves to shift laterally, which can cause serious handling problems. Inspect the U-bolts for rust, stripped threads, or looseness. In South Florida’s humid climate, U-bolts are particularly prone to corrosion.
Use your torque wrench to check that all U-bolts are tightened to the manufacturer’s specifications. Over time, they can loosen due to vibration and thermal expansion and contraction — something that happens frequently in Florida’s climate where temperatures can swing significantly between morning and afternoon.
Step 4: Examine the Spring Shackles and Mounting Hardware
Spring shackles connect the ends of the leaf springs to the frame of the golf cart. They allow the spring to flex and change length as it compresses and rebounds. Worn or damaged shackles can cause handling issues and accelerate wear on the springs themselves.
Inspect both shackles on each spring for cracks, bending, or excessive wear at the pivot points. Check the shackle bushings — these are small rubber or polyurethane inserts that cushion the connection between the shackle and the frame. Worn bushings are a common cause of squeaking and clunking noises and should be replaced if they show significant wear or cracking.
In South Florida’s heat, rubber bushings can degrade faster than in cooler climates. Polyurethane bushings are a popular upgrade because they hold up better in extreme temperatures and are more resistant to the UV radiation that’s constant here in the Sunshine State.
Step 5: Check the Spring Eye Bushings
At the front end of each leaf spring, there’s a rolled eye that connects to the frame via a bolt. Inside this eye is a bushing — similar to the shackle bushings — that allows the spring to pivot smoothly. These bushings wear out over time and are another common source of noise and handling problems.
Check for play or looseness at the spring eye. Grab the spring and try to move it side to side — there should be minimal movement. Excessive play indicates worn bushings that need replacement. Also look for any cracking or deterioration of the bushing material itself.
Step 6: Clean and Lubricate the Leaf Springs
Lubrication is one of the most important — and most commonly skipped — steps in leaf spring maintenance. The leaves in a spring pack slide against each other slightly as the spring flexes. Without proper lubrication, this creates friction, noise, and accelerated wear.
How to Properly Lubricate Leaf Springs
Start by cleaning the springs thoroughly. Use a wire brush to remove any loose rust, dirt, and old lubricant. In South Florida, you may also encounter salt deposits, especially if you live near the coast or frequently drive near the beach. A mild degreaser can help remove built-up grime.
Once the springs are clean, apply a leaf spring lubricant between each leaf. You can use a specialized leaf spring lubricant, graphite-based lubricant, or a high-quality silicone spray. Avoid using standard grease, as it tends to attract dirt and can actually cause more problems over time.
Apply the lubricant along the full length of each leaf, working it into the spaces between the leaves. This reduces friction, eliminates squeaking, and helps prevent corrosion from forming between the leaves where moisture can get trapped.
Pro tip: In South Florida’s salt air environment, consider applying a rust-inhibiting coating to the outer surfaces of your leaf springs after cleaning and lubrication. This extra layer of protection can significantly extend the life of your springs.
Step 7: Inspect and Treat Rust and Corrosion
Surface rust is a fact of life for any metal component in South Florida. The key is to address it before it becomes structural corrosion that compromises the integrity of your springs.
For light surface rust, use a wire brush or sandpaper to remove the oxidation, then treat the area with a rust converter or rust-inhibiting primer. Follow up with a spray-on undercoating or rust-preventive paint to seal the metal from future moisture exposure.
For heavier rust that has pitted or eaten into the metal, you’ll need to consult with a professional. Deep corrosion can weaken the spring significantly, and it’s not worth risking your safety to save money on a replacement. The team at South Florida Golf Carts can assess the extent of corrosion and recommend whether repair or replacement is the right call.
Step 8: Check Ride Height and Spring Sag
One of the best indicators of overall leaf spring health is your golf cart’s ride height. Springs that have fatigued and lost their tension will allow the cart to sit lower than designed, which affects handling, ground clearance, and tire wear.
Measure the distance from the ground to a consistent reference point on the frame on both sides of the cart. Compare these measurements to each other and to the manufacturer’s specifications if available. A difference of more than half an inch between sides indicates uneven spring wear or a broken leaf. A significant overall drop in ride height suggests the springs have sagged and need replacement.
Keep in mind that if you regularly carry heavy loads or multiple passengers, your springs will wear faster. South Florida golf cart owners who use their carts for neighborhood transportation, beach access, or hauling equipment should pay particular attention to this measurement.
Step 9: Road Test and Dynamic Inspection
After completing your static inspection and any necessary maintenance, take the cart for a test drive over a variety of surfaces. Pay attention to how the cart handles bumps, how it corners, and whether you notice any unusual noises.
Listen for squeaking, clunking, or rattling sounds that weren’t there before — or that you may have been ignoring. A properly maintained leaf spring system should provide a smooth, quiet ride with no unusual noises or handling quirks.
If possible, have someone walk alongside the cart while you drive slowly over a bump so they can observe the spring flex and rebound. The movement should be smooth and controlled, not jerky or erratic.
Step 10: Document Your Inspection and Schedule Follow-Up
Good maintenance is all about consistency. After completing your pre-summer inspection, write down what you found, what you did, and what — if anything — needs follow-up attention. Note the current condition of each component so you have a baseline for your next inspection.
Set a reminder to inspect your leaf springs again mid-summer and at the end of the season. In South Florida’s demanding climate, more frequent checks are always better than fewer. A quick visual inspection every few months takes only a few minutes but can catch developing problems before they become expensive repairs.
When to Replace vs. Repair Your Leaf Springs
Not every leaf spring issue requires full replacement. Minor rust, worn bushings, and loose hardware can all be addressed with relatively simple repairs. However, some conditions always warrant replacement rather than repair.
Always Replace Leaf Springs If You Notice:
Any cracked or broken leaves: A cracked spring is a safety hazard. There’s no safe way to repair a broken leaf — replacement is the only option.
Severe corrosion: If rust has eaten through more than surface-level metal, the structural integrity of the spring is compromised.
Significant spring sag: Springs that have lost their tension and can no longer maintain proper ride height need to be replaced.
Multiple worn components: If the springs themselves are in poor condition along with worn bushings, damaged shackles, and corroded U-bolts, it’s often more cost-effective to replace the entire spring assembly rather than piecemeal repair.
Repair Options for Less Severe Issues
If your springs are structurally sound but showing wear, there are several repair options to consider. Replacing worn bushings is a relatively inexpensive repair that can dramatically improve ride quality and eliminate annoying noises. New U-bolts and center bolts are inexpensive insurance against future failures. Re-arching — a process where springs are heated and re-formed to their original curvature — is an option for springs that have sagged but aren’t cracked or severely corroded.
For guidance on whether repair or replacement is right for your specific situation, the experts at South Florida Golf Carts are available to help. They have extensive experience working with all makes and models of golf carts and understand the unique challenges that South Florida’s climate presents.
Upgrading Your Leaf Springs for South Florida Conditions
If you’re already doing maintenance work on your leaf springs, it’s worth considering whether an upgrade might be appropriate. There are several aftermarket options that can improve performance and durability, particularly in South Florida’s demanding environment.
Heavy-Duty Leaf Springs
If you regularly carry heavy loads or passengers, heavy-duty leaf springs can provide better support and longer service life than stock springs. They’re stiffer than standard springs, which can make the ride feel slightly firmer, but they’re much more resistant to sagging and fatigue under heavy use.
Stainless Steel or Coated Springs
For maximum corrosion resistance in South Florida’s salt-air environment, consider upgrading to stainless steel springs or springs with a specialized corrosion-resistant coating. While these options cost more upfront, they can last significantly longer than standard steel springs in coastal environments.
Upgraded Bushings
As mentioned earlier, polyurethane bushings are a popular upgrade over standard rubber bushings. They’re more durable, more resistant to heat and UV radiation, and provide more precise handling. Many South Florida golf cart owners find that upgrading to polyurethane bushings is one of the best value improvements they can make to their suspension system.
Seasonal Maintenance Tips Beyond Leaf Springs
While leaf springs are the focus of this guide, a complete pre-summer inspection should also cover several other key components that work in conjunction with your suspension system.
Tires and Wheels
Check tire pressure, tread depth, and overall condition. South Florida’s heat accelerates tire aging and can cause rubber to crack and harden. Make sure lug nuts are properly torqued and that wheels are free of cracks or bends.
Shock Absorbers
If your golf cart is equipped with shock absorbers in addition to leaf springs, inspect them for leaks, damage, and proper operation. Shocks and springs work together — worn shocks can put extra stress on your leaf springs and vice versa.
Battery and Electrical System
For electric golf carts, summer heat is particularly hard on batteries. Check water levels in lead-acid batteries, clean terminals, and have the battery pack tested if you notice reduced range or power.
Brakes
Inspect brake pads, drums, and cables for wear and proper adjustment. Good brakes are essential for safety, especially if you’re driving your cart in busier areas during the summer season.
Finding Professional Help in South Florida
While many of the inspection and maintenance tasks described in this guide can be performed by a reasonably handy golf cart owner, there’s no substitute for professional expertise when it comes to complex repairs or when you’re unsure about what you’re seeing.
South Florida Golf Carts offers comprehensive maintenance and repair services for golf cart owners throughout the region. Their experienced technicians are familiar with the specific challenges that South Florida’s climate presents and can quickly identify issues that might not be obvious to the untrained eye. Whether you need a full pre-summer inspection, leaf spring replacement, or an upgrade to a more durable suspension setup, they have the knowledge and parts to get the job done right.
“We always recommend that golf cart owners in South Florida get a professional inspection at least once a year, ideally before the summer season ramps up. Catching a small problem in May is always better than dealing with a breakdown in August when the heat is at its worst,” the team at South Florida Golf Carts advises.
Don’t wait until something breaks to get your cart serviced. A proactive approach to maintenance is always more cost-effective than reactive repairs, and it keeps you and your passengers safe throughout the season.
Creating a Year-Round Leaf Spring Maintenance Schedule
To make it easier to stay on top of your leaf spring maintenance, here’s a simple year-round schedule tailored to South Florida’s seasons and typical golf cart usage patterns.
Pre-Summer (April–May)
Complete the full checklist outlined in this guide. This is your most important maintenance window of the year, as it prepares your cart for the high-use summer season. Focus on thorough inspection, lubrication, rust treatment, and addressing any issues found during inspection.
Mid-Summer (July–August)
Perform a quick visual inspection, checking for any new rust, unusual noises, or changes in ride height. Re-lubricate if needed, especially if the cart has been used heavily or exposed to significant rain and flooding — both common in South Florida’s rainy season.
Post-Summer/Pre-Fall (September–October)
Another full inspection is worthwhile after the intense summer season. Check for any wear or damage that occurred during high-use months. Address any issues before the cooler months when usage may decrease.
Winter Check (December–January)
Even in South Florida’s mild winters, a quick inspection is valuable. If your cart will be used less frequently, apply a fresh coat of rust-inhibiting coating to the springs and store the cart in a covered area if possible to minimize exposure to salt air and moisture.
Final Thoughts: Don’t Skip the Leaf Springs
It’s easy to overlook leaf springs when thinking about golf cart maintenance. They’re not as visible as tires, not as obviously important as batteries, and not as frequently discussed as brakes or motors. But they play a fundamental role in how your cart rides, handles, and performs — and in South Florida’s demanding climate, they need regular attention to stay in top shape.
By following this comprehensive checklist before each summer season, you’ll extend the life of your leaf springs, improve your cart’s ride quality, and ensure that you and your passengers are riding safely. A few hours of maintenance now can save you from a breakdown on the golf course, a rough ride through your neighborhood, or a costly repair bill later in the season.
If you have any questions about leaf spring maintenance, need professional service, or are considering an upgrade for your South Florida golf cart, reach out to South Florida Golf Carts. Their team is ready to help you get the most out of your golf cart all year long — because in South Florida, golf cart season never really ends.
Stay safe, ride smooth, and enjoy everything this incredible region has to offer from the seat of your well-maintained golf cart.